


For decades, the standard gray slab was relegated to the hidden structural foundations of our homes or the purely utilitarian surfaces of our driveways and sidewalks. It was a material appreciated strictly for its strength, not its beauty. Today, however, that paradigm has completely shifted. What was once a basic building block has evolved into a front-and-center architectural feature. From sweeping, resort-style pool decks and meticulously stamped outdoor patios to polished interior basement floors, this versatile material has become the cornerstone of high-end property upgrades.
However, the reality of working with such a formidable medium must be acknowledged before any project begins. While it is incredibly durable and capable of lasting for generations, it is also extremely heavy, permanent, and entirely unforgiving. Unlike wood that can be unscrewed and recut, or drywall that can be patched and repainted, mistakes made during a pour or finishing phase are practically written in stone. An improperly graded subbase or a poorly timed finish can lead to irreversible cracking, scaling, and thousands of dollars in remediation costs.
This comprehensive guide is designed to walk you through the entire lifecycle of a major exterior or interior upgrade. We will cover the critical end-to-end process, beginning with the safe demolition and recycling of existing hardscapes, navigating the chaotic logistics of pour day, engineering the structural integrity of your subbase, and finally, applying high-end aesthetic finishes and protective sealants. A successful property transformation requires rigorous site preparation, an intimate understanding of curing logistics, and strategic partnerships with specialized professionals to ensure your investment withstands the test of time and weather.
Safely Removing and Recycling Old Materials
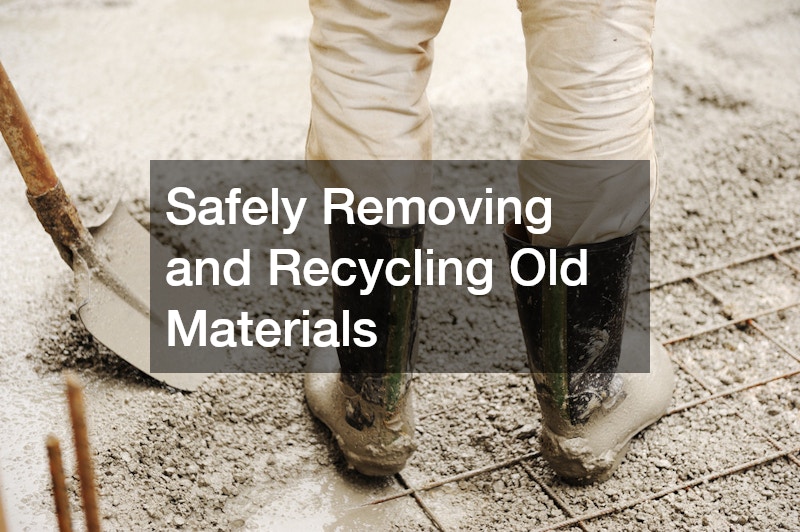
The foundational first step of preparing your property for a new upgrade often involves safely dismantling and disposing of your existing, failing hardscapes. Before you can build something beautiful and structurally sound, you must clear the canvas. However, demolition is rarely as simple as renting a jackhammer and swinging a sledgehammer. It is a highly technical phase that requires caution, structural awareness, and a strategic plan for waste management.
Assess Structural Integrity Before Demolition
Before any heavy machinery is brought onto your property, a thorough assessment of the existing slab must be conducted. Older slabs often hide dangerous surprises beneath their surfaces. You must determine if the existing structure contains embedded rebar grids, welded wire mesh, or, most hazardously, post-tension cables. Post-tension cables are high-strength steel tendons stretched under immense pressure to give the slab added tensile strength. If a homeowner or an inexperienced worker accidentally cuts through a live post-tension cable during demolition, the cable can snap and whip out of the material with explosive, deadly force.
Furthermore, you must identify where hidden utility lines—such as water pipes, radiant heating tubes, or electrical conduits—are routed. Because of these hidden dangers, bringing in a specialized concrete cutting company is often the safest and most efficient route. These professionals use advanced techniques to safely segment massive, reinforced slabs into manageable blocks without compromising adjacent foundation walls, damaging underground utilities, or risking severe injury.
-
Pre-Demolition Checklist:
-
Locate and mark all underground utilities (gas, water, electric, internet).
-
Verify the presence of steel reinforcement (rebar or wire mesh).
-
Check municipal codes regarding noise ordinances and allowable hours for heavy demolition.
-
Establish a clear, safe access path for heavy machinery to enter and exit your yard without destroying landscaping.
-
Implement Sustainable Waste Management
Once the old material is broken up, you are faced with a massive logistical hurdle: waste disposal. Debris from a standard driveway or large patio can weigh tens of thousands of pounds. Loading this rubble into dumpsters and paying for multiple heavy-haul trips to a local landfill is incredibly expensive and environmentally taxing. Dump fees alone can consume a significant portion of your renovation budget.
A smarter, more sustainable, and increasingly popular approach is to repurpose the rubble directly on your property. By utilizing local concrete crushing services, you can have the old, broken slabs pulverized on-site. The heavy machinery crushes the debris into a fine, highly compactible aggregate. This recycled material can then be spread and compacted to serve as the perfect, free structural subbase for your new pour. This strategy eliminates landfill fees, reduces the carbon footprint associated with heavy trucking, and saves you the cost of purchasing new crushed gravel for your foundation layer.
Coordinating Logistics for the Perfect Pour
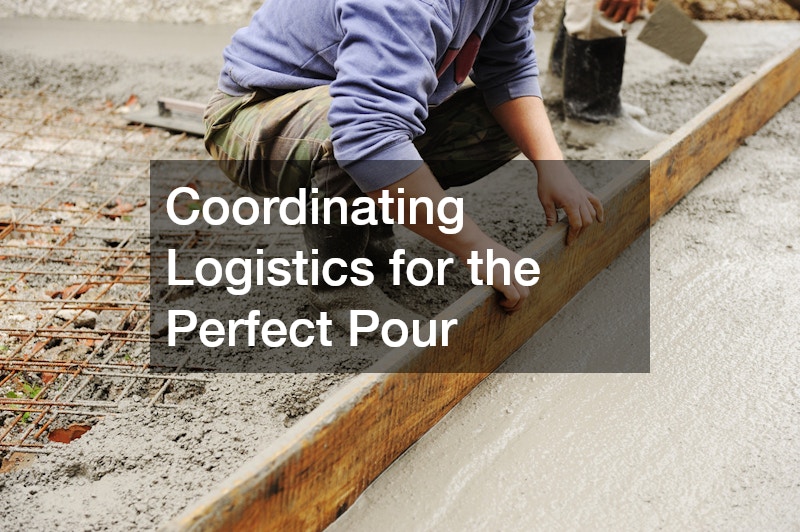
Once the site is cleared and graded, you enter the most high-stakes phase of the project: the pour. This material does not “dry” like paint; it cures through a volatile, heat-producing chemical reaction known as hydration. From the moment water is mixed with the dry cement powder at the batch plant, the clock starts ticking. Managing the strict timeline, the massive material volumes, and the heavy machinery required on pour day is what separates a flawless finish from a structural disaster.
Calculate Your Mix and Volume Accurately
Ordering the right amount of material is a science. If you order too little, you will end up with a “cold joint”—a weak, visible seam where the first batch hardened before the second truck arrived to finish the pour. If you order too much, you are paying for wasted material and incurring environmental disposal fees for the excess. Volume is calculated in cubic yards. The formula is Length multiplied by Width, multiplied by Depth (all converted to feet), divided by 27.
However, mathematical perfection rarely matches real-world site conditions. Subgrades are rarely perfectly level, and forms can bow slightly under the immense weight of the wet mix. Therefore, the golden rule of estimating is to always order at least 10% more than your strict mathematical calculation. Because the chemical curing process waits for no one, scheduling a reliable concrete delivery company several weeks in advance is critical. You must coordinate the arrival times perfectly so that the trucks arrive exactly when your crew is ready. A truck that gets delayed in traffic or arrives before the forms are fully braced can ruin the entire project.
Secure Heavy-Duty Tools for Proper Curing
Moving and finishing thousands of pounds of rapidly hardening material before it sets requires specialized equipment. While small DIY tools might suffice for setting a mailbox post, they will fail spectacularly on a large residential patio or driveway. The material must be vibrated, screeded, and floated in a highly specific sequence to force the heavy aggregate stones downward while bringing a smooth layer of “cream” (cement paste) to the surface.
If you are managing a dedicated crew of laborers yourself, you must equip them properly. Utilizing a local concrete equipment rental yard allows homeowners and small independent crews to access commercial-grade tools for the weekend without making a massive upfront financial investment. Having the right mechanical assistance ensures the surface is dense, flat, and free of the trapped air pockets that cause future spalling.
Engineering a Durable and Welcoming Approach

The front-of-house hardscaping—primarily your driveway and front walkways—serves as the functional and aesthetic anchor of your property. However, this area is subjected to extreme punishment. It must withstand the crushing weight of multiple vehicles, the corrosive effects of leaking automotive fluids, and the relentless expansion and contraction caused by seasonal weather changes. Designing a surface that can survive these conditions requires heavy engineering starting from the dirt up.
Fortify Your Subbase to Prevent Winter Heaving
The most beautiful surface in the world will crack and crumble within a year if the ground beneath it is unstable. The soil underneath your slab is susceptible to capillary action, drawing groundwater up toward the surface. In cold climates, when this trapped moisture freezes, it expands with immense hydraulic force. This phenomenon, known as frost heave, will lift and snap a thick slab with terrifying ease.
To prevent this, you must excavate all organic topsoil, dirt, and clay down to a depth of at least 4 to 8 inches, depending on your local frost line and soil composition. This trench must then be filled with a crushed stone base—typically a mix of jagged stones and stone dust that locks together tightly when mechanically compacted. Unlike round river rock, which shifts under pressure, a crushed aggregate base provides a rigid, load-bearing foundation while allowing excess water to drain harmlessly away from the bottom of the slab. Reputable concrete driveway companies understand that the secret to a slab that lasts fifty years lies entirely in the hours spent compacting the unseen gravel base before the delivery trucks ever arrive.
Install Control Joints to Dictate Cracking
It is an industry truism that all slabs will eventually crack; the goal is simply to control exactly where and how those cracks occur. As the material cures, the water inside it evaporates, causing the entire mass to shrink slightly. This shrinkage builds up internal tensile stress. Because the material is exceptionally strong against compression but relatively weak against tension, the stress eventually forces it to tear itself apart.
To mitigate this, control joints (also known as contraction joints) must be cut or grooved into the surface. A control joint is essentially a planned line of weakness. By cutting a groove roughly one-quarter of the depth of the total slab, you force the inevitable shrinkage crack to happen neatly down inside that groove, rendering it completely invisible from the surface. A knowledgeable concrete contractor knows the precise mathematical rules for joint spacing. As a general guideline, joints should be spaced no further apart than 2 to 3 times (in feet) the thickness of the slab (in inches). For example, a standard 4-inch thick patio should have control joints spaced roughly every 8 to 12 feet. Failing to map out and execute these joints properly will result in jagged, random spiderweb cracks sprawling across your new driveway.
Adapting Your Space Safely and Cleanly

Upgrading your property often means altering existing structures rather than just pouring new ones. Whether you are cutting a trench in your basement floor to install plumbing for a new downstairs bathroom, or cutting through a foundation wall to install egress windows for a legal subterranean bedroom, modifying existing, cured structures is highly hazardous work. It requires precision tools, advanced scanning technology, and strict adherence to environmental safety protocols.
Use Wet-Saw Techniques to Mitigate Hazardous Dust
One of the most dangerous aspects of cutting into existing slabs is the creation of airborne crystalline silica dust. When dry saw blades grind against the cement and aggregates, they release microscopic particles into the air. If inhaled, these glass-like particles scar the lung tissue, leading to an incurable and fatal respiratory disease known as silicosis. The Occupational Safety and Health Administration (OSHA) has extremely strict regulations regarding silica exposure on jobsites.
To protect your family, your pets, and your home’s HVAC system from this pervasive dust, you must mandate water-suppression techniques for any indoor or outdoor cutting. Utilizing professional concrete cutting services ensures that the crews arrive equipped with specialized hydraulic or electric saws featuring integrated water feeds. These wet saws constantly flood the cutting blade with a stream of water, binding the silica dust into a heavy slurry that drops straight to the ground where it can be safely vacuumed up, keeping your home’s air perfectly clean and safe.
-
Best Practices for Indoor Structural Modifications:
-
Always turn off the central HVAC system to prevent dust from being circulated throughout the house.
-
Seal off the work area with thick plastic sheeting and heavy-duty zipper doors.
-
Use industrial HEPA vacuums to immediately extract slurry and residual dust.
-
Ensure the work zone is negatively pressurized with exhaust fans pulling air directly out a window.
-
Map Out Utilities Using Ground-Penetrating Radar
Trenching or coring blindly into a foundation is a gamble you cannot afford to take. A seemingly solid basement floor can conceal main sewer lines, pressurized water mains, or high-voltage electrical conduits. Striking any of these with a diamond-tipped saw blade can cause immediate flooding, electrocution, or tens of thousands of dollars in emergency plumbing repairs.
Before a single blade touches the floor, the area must be mapped out. Modern technology allows us to look inside the structure without destroying it. Investing in comprehensive concrete services that include Ground-Penetrating Radar (GPR) scanning is an essential insurance policy. GPR uses high-frequency radar pulses to detect the depth and location of metallic and non-metallic objects buried within the slab. Unlike older X-ray technologies, GPR does not emit harmful radiation, requires access to only one side of the floor or wall, and provides real-time 3D imaging, allowing the technicians to map safe cutting zones directly onto the surface with absolute precision.
Elevating Aesthetics and Protecting Surfaces

The final phase of any upgrade transitions the focus from structural durability to pure aesthetic appeal and long-term protection. The days of accepting a dull, flat, gray finish are over. Through advanced texturing techniques, chemical stains, and high-tech polymeric sealers, you can transform a basic patio or garage floor into a high-end architectural masterpiece that perfectly mimics natural materials while offering superior resilience.
Utilize Stamping and Staining for Custom Textures
Stamping is the art of imprinting three-dimensional textures onto the surface before it fully hardens. This process can replicate the rich look of wide-plank wood decking, the intricate patterns of cobblestone streets, or the elegant, natural clefts of flagstone and slate. Achieving a flawless stamped pattern requires impeccable timing. If the crew applies the heavy polyurethane stamp mats while the mix is too wet, the workers’ weight will sink into the surface, destroying the grade. If they wait too long, the surface becomes too rigid to accept the texture.
The stamping process is paired with chemical acid stains or integral color pigments to create mottled, realistic shading. Because this process is highly artistic and incredibly time-sensitive, it is heavily recommended to seek out specialized decorative concrete services. These artisans understand exactly when to apply colored powder release agents (which prevent the stamps from sticking and add secondary antique coloring) and how to seamlessly blend the stamp patterns so there are no repeating lines or awkward joint alignments. The result is a bespoke, luxury surface that looks identical to premium natural stone but costs a fraction of the price and is immune to the weed growth and settling issues common with individual stone pavers.
Seal Surfaces Promptly to Block Moisture and Stains
Regardless of how beautiful the final finish is, it remains a highly porous material at the microscopic level. If left untreated, it will act like a giant sponge, readily absorbing motor oil, rusty water from patio furniture, decaying leaves, and chemical de-icing salts. To preserve your investment, the surface must be chemically sealed.
However, you must be patient. A newly poured slab must be allowed to breathe and expel its internal moisture for roughly 28 days to achieve its full structural cure before any topical treatments are applied. Once the curing window has passed, you must choose the appropriate sealer for the environment. For outdoor stamped patios and driveways, penetrating silane-siloxane sealers are ideal; they dive deep into the pores to create a hydrophobic barrier without altering the surface traction.
For high-abuse indoor areas, such as a custom garage or a basement workshop, you need an impermeable barrier. Bringing in a professional concrete coating service to apply a multi-layered polyaspartic or epoxy floor system is the ultimate upgrade. These high-performance industrial coatings bond mechanically to the floor, creating a thick, glossy, armor-like shell that is completely impervious to chemical spills, road salt, and the hot-tire pickup that often peels cheap DIY paints right off the floor.
Conclusion
Transforming your property through extensive hardscape upgrades is a monumental undertaking that demands respect, preparation, and precision. By shifting your perspective to view this material not just as a basic utility, but as a complex, highly engineered architectural element, you set the stage for a successful and enduring renovation.
A flawless execution requires a multi-phased strategy. It begins with the safe, intelligent demolition and recycling of old hazards. It requires the strict orchestration of heavy machinery and precise volume calculations to manage a highly volatile chemical curing process. It demands a hyper-focus on the invisible groundwork—the excavation, the compaction of the crushed stone subbase, and the strategic placement of control joints. Finally, it relies on the artistic application of textures, colors, and advanced chemical sealers to protect the finished product from the harsh realities of daily use and seasonal weather.
While these major upgrades require significant upfront capital, careful planning, and a tolerance for temporary construction chaos, the long-term payoff is undeniable. A beautifully engineered driveway, a resort-style stamped patio, or a pristine, epoxy-coated garage floor adds immense, tangible equity to your home. If you are ready to elevate your exterior or interior spaces, begin by mapping out your functional layout, testing your soil drainage, and requesting detailed quotes from specialized professionals to kick off the first phase of your property transformation.